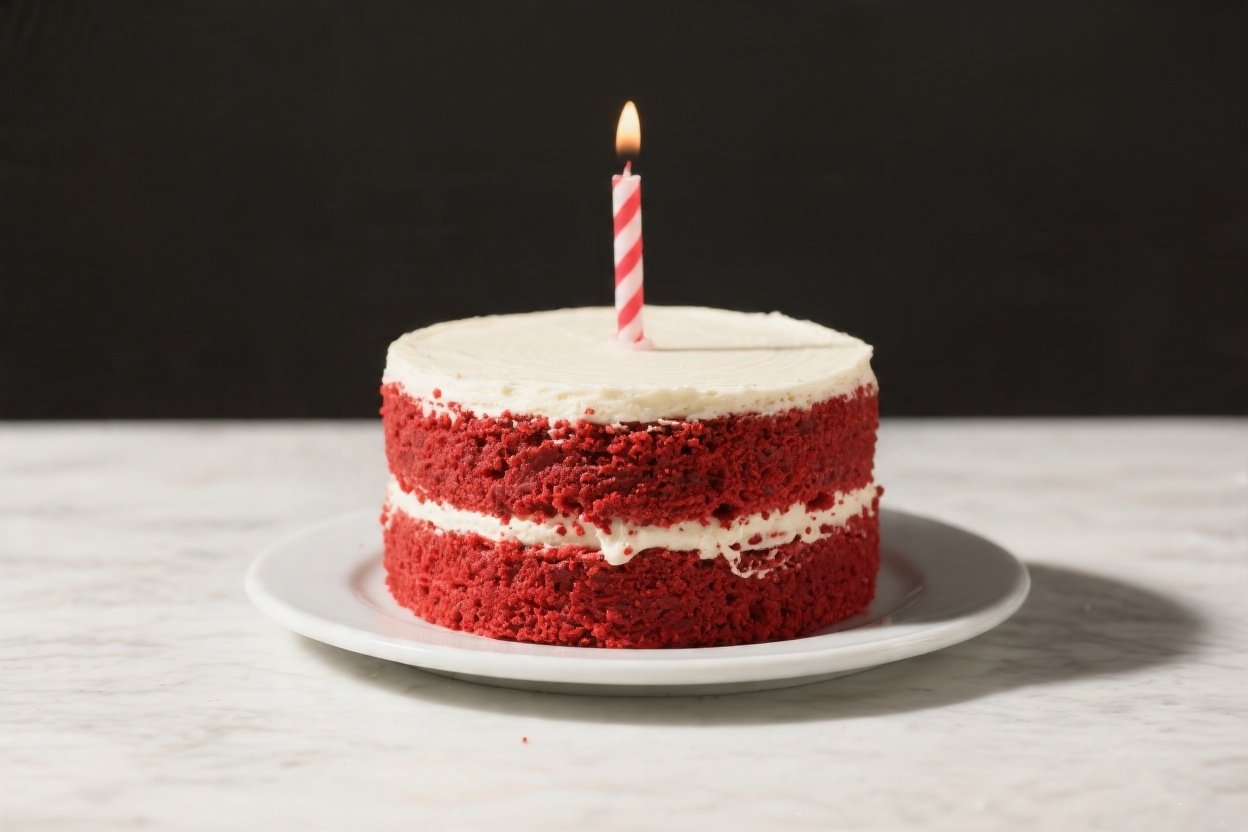
Red Velvet Birthday Cake – Soft, Velvety, and Party-Ready
There’s something irresistible about a red velvet birthday cake. It’s classic, colorful, and just the right mix of cocoa and vanilla with a hint of tang. The crumb is tender, the layers are moist, and the cream cheese frosting ties everything together with a silky finish.
This version is easy to bake at home and makes a beautiful centerpiece for any celebration. You’ll get bakery-level results without complicated steps or hard-to-find ingredients.
What Makes This Recipe So Good
This red velvet cake is all about balance: a gentle cocoa flavor, a subtle tang from buttermilk, and a plush crumb that holds up to generous frosting. The oil-butter combo keeps it moist for days without feeling heavy.
Buttermilk and vinegar react with cocoa for that signature velvety texture and deep hue. The frosting is smooth, not overly sweet, and spreads like a dream. Best of all, the method is straightforward and reliable, even if you’re new to layer cakes.
Shopping List
- All-purpose flour – for structure
- Granulated sugar – for sweetness and tender crumb
- Unsweetened natural cocoa powder – not Dutch-processed
- Baking soda – lifts the batter
- Fine salt – balances flavor
- Unsalted butter – softened
- Neutral oil (canola or vegetable)
- Large eggs – room temperature
- Buttermilk – room temperature
- Vanilla extract
- White vinegar
- Red gel food coloring (or liquid, but gel is stronger)
- Cream cheese – full-fat, block style, room temperature
- Powdered sugar – sifted
- Heavy cream (optional, for frosting consistency)
Instructions
- Prep the pans and oven: Heat oven to 350°F (175°C).
Grease and line two 9-inch round cake pans with parchment on the bottom. Lightly flour the sides or use baking spray with flour.
- Whisk dry ingredients: In a medium bowl, whisk 2 1/2 cups flour, 2 tablespoons natural cocoa powder, 1 teaspoon baking soda, and 1/2 teaspoon salt. Set aside.
- Cream butter and sugar: In a large bowl, beat 1/2 cup softened butter with 1 3/4 cups sugar on medium-high until light and fluffy, about 2–3 minutes.
- Add oil and eggs: Beat in 1/3 cup neutral oil.
Add 3 large eggs one at a time, mixing well and scraping the bowl between additions. Stir in 2 teaspoons vanilla.
- Add color and acidity: Mix 1 cup buttermilk with 1 tablespoon white vinegar and 1–2 teaspoons red gel food coloring. Start with 1 teaspoon and add more if needed for a rich red.
- Combine wet and dry: Add the dry mixture to the butter mixture in three parts, alternating with the red buttermilk mixture in two parts.
Begin and end with dry ingredients. Mix on low just until smooth. Do not overmix.
- Bake: Divide batter evenly between pans.
Smooth tops. Bake 24–28 minutes, until a toothpick comes out with a few moist crumbs. Cakes should spring back lightly when touched.
- Cool completely: Let cakes cool in pans 10 minutes, then turn out onto a wire rack.
Peel off parchment and cool fully before frosting.
- Make frosting: Beat 12 ounces cream cheese (room temp) with 1/2 cup softened unsalted butter until silky, about 2 minutes. Add 2 teaspoons vanilla and a pinch of salt. Gradually mix in 3 1/2–4 cups sifted powdered sugar on low, then whip on medium until fluffy.
If too thick, add 1–2 tablespoons heavy cream. If too soft, chill briefly.
- Level and crumb coat: If needed, level cake tops with a serrated knife. Place one layer on a board, spread a generous layer of frosting, top with second cake.
Apply a thin crumb coat around the sides and top. Chill 20–30 minutes.
- Frost and decorate: Add a final thick layer of frosting and smooth. Crumble any cake trimmings for a classic red crumb border, add sprinkles, or keep it simple.
- Set before slicing: Chill 20 minutes to firm up, then slice with a warm, clean knife for neat layers.
Keeping It Fresh
Red velvet stays moist for days when stored properly.
Keep the cake covered in the fridge for up to 4 days. Let slices sit at room temperature for 20–30 minutes before serving for the best texture. For longer storage, wrap unfrosted layers tightly and freeze for up to 2 months.
Thaw wrapped at room temperature, then frost. Frosted slices also freeze well individually if wrapped and sealed.
Health Benefits
- Portion control: A celebratory dessert can still fit into a balanced diet. Slice modestly and enjoy mindfully.
- Homemade advantage: You control ingredients—use quality cocoa, real vanilla, and moderate the frosting sweetness.
- Lower sugar tweaks: Reduce powdered sugar slightly in the frosting or use less frosting between layers to cut overall sugar.
- Ingredient swaps: Choose oil with healthy fats and consider a lighter cream cheese to reduce saturated fat, if desired.
What Not to Do
- Don’t skip the vinegar or buttermilk: They’re key for texture, flavor, and color.
Subbing plain milk without acid leads to a denser cake.
- Don’t overmix: Too much mixing after adding flour creates a tough crumb. Mix just until combined.
- Don’t use Dutch-processed cocoa: It’s less acidic and won’t react the same. Stick to natural cocoa for proper rise and flavor.
- Don’t frost warm cakes: Warm layers melt frosting, causing sliding and crumbs.
Cool completely.
- Don’t overbake: Dry cake is the enemy. Start checking early and pull when a few moist crumbs remain on the tester.
Alternatives
- Cupcakes: Fill liners two-thirds full and bake 16–18 minutes. This recipe yields about 24 cupcakes.
- Three layers: Bake in three 8-inch pans for 18–22 minutes.
Frost between thin layers for a tall, elegant look.
- No food coloring: The cake will be a natural cocoa-tinted brown with the same great flavor. You can add beet powder for a softer hue, but it may change flavor slightly.
- Gluten-free: Use a quality 1:1 gluten-free flour blend with xanthan gum. Let the batter rest 10 minutes before baking to hydrate.
- Egg-free: Replace each egg with 1/4 cup unsweetened applesauce plus a pinch more baking soda.
Expect a slightly denser crumb but still tender.
- Cream cheese alternatives: For a lighter frosting, whip stabilized sweetened whipped cream with a touch of cream cheese for structure, or use vanilla ermine frosting for a classic old-fashioned option.
FAQ
Why is red velvet cake red?
Traditionally, natural cocoa and acidic ingredients caused a reddish tint. Modern recipes enhance the color with red food coloring for a bold, party-ready look.
Can I use beet juice instead of food coloring?
Yes, but it produces a softer, sometimes brownish-red tone and may add an earthy note. Beet powder works better than juice for color intensity.
What’s the best way to get flat, even layers?
Use bake-even strips around the pans, avoid overfilling, and bake on the center rack.
Level the tops with a serrated knife only after cooling.
How do I keep the frosting from being runny?
Start with room-temperature block cream cheese and butter, not whipped or tub-style. Add powdered sugar gradually, and chill the frosting for 10 minutes if it feels loose.
Can I make the cake ahead?
Yes. Bake layers a day ahead, wrap tightly, and refrigerate.
Frost the next day. Fully frosted cakes also hold well overnight when covered and chilled.
What if I don’t have buttermilk?
Make a quick substitute: add 1 tablespoon white vinegar or lemon juice to a 1-cup measure, then fill with milk. Let sit 5 minutes before using.
How red should the batter be?
It should look deeper than the color you want in the baked cake.
Use gel coloring for strength and add gradually until you reach a rich, vibrant red.
Can I use brown sugar in the cake?
You can swap up to 1/2 cup of the granulated sugar for light brown sugar for a touch more moisture and flavor, but keep most of it granulated for the right crumb.
How do I slice clean layers?
Chill the cake 20–30 minutes, use a long serrated knife, and wipe the blade clean between cuts. A gentle sawing motion keeps the crumb neat.
What’s the ideal frosting thickness between layers?
About 1/4 to 1/3 inch gives a balanced bite without overpowering the cake. Save a little extra for a smooth outer coat and decorative swirls.
In Conclusion
This red velvet birthday cake is soft, vibrant, and surprisingly easy to master.
With simple ingredients and a few smart steps, you’ll get bakery-style layers and a tangy cream cheese finish everyone loves. Make it classic, dress it up with sprinkles, or turn it into cupcakes—either way, it’s a guaranteed celebration hit.
Printable Recipe Card
Want just the essential recipe details without scrolling through the article? Get our printable recipe card with just the ingredients and instructions.